Table of Contents
Open Table of Contents
- Best HUD Layout for Free Fire 2026
- Quick HUD Summary (Skip Here If You’re In a Hurry)
- Why Your HUD Layout Directly Affects Gunfights
- Understanding HUD Zones on a Mobile Screen
- Default HUD vs. Optimised HUD
- Best HUD Layout for Thumb Players (2-Finger)
- Best HUD Layout for 3-Finger and 4-Finger Claw
- HUD Settings Worth Enabling
- HUD Layout Tips by Device Screen Size
- How to Save and Test Your HUD Layout
- Common HUD Mistakes That Hurt Performance
- Frequently Asked Questions
- Final Verdict
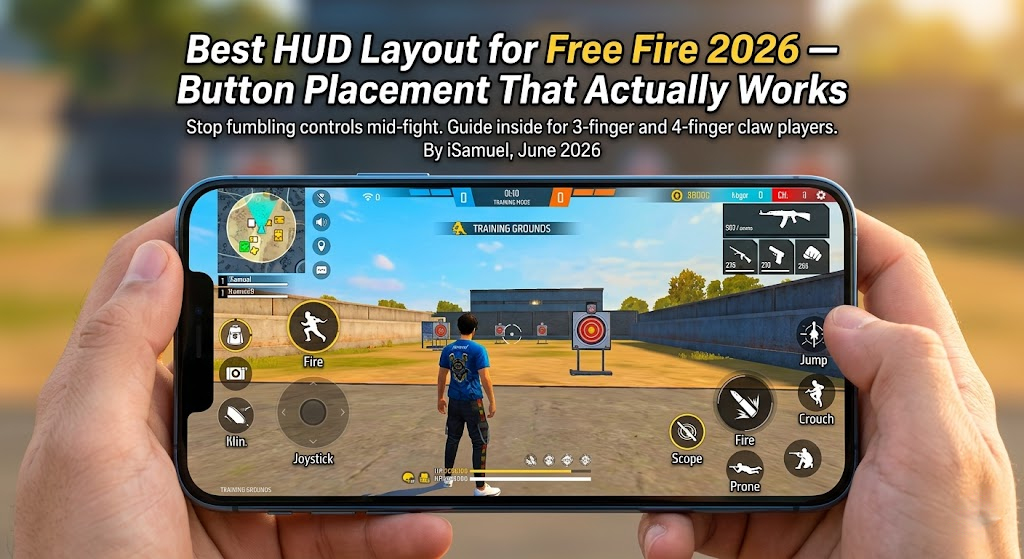
Best HUD Layout for Free Fire 2026
Your HUD layout is doing more damage to your game than any enemy ever has. That sounds dramatic but it’s true — I’ve watched players lose gunfights they had no business losing simply because their fire button was half a thumb-stretch too far, or their crouch and prone were stacked so close together that crouching mid-fight became a coin flip.
Free Fire gives you full HUD customisation, which is either a gift or a headache depending on how you approach it. Most players either never touch the default layout, or they spend two matches tweaking it and give up. Neither approach works. A proper HUD setup takes deliberate thought, a few hours of refinement, and the willingness to actually test it in real matches before deciding it’s wrong.
After testing multiple HUD setups across ranked and casual matches on both a 6.4-inch and a 6.8-inch Android device, a few patterns kept showing up — specific button positions that consistently improved reaction speed, reduced accidental presses, and made the overall feel of the game tighter. That’s what this guide is built on. Whether you’re playing thumb or training for 4-finger claw, there’s a tested starting point here for you.
Quick HUD Summary (Skip Here If You’re In a Hurry)
Not everyone needs the full breakdown. If you just want a tested starting point, here it is:
| Grip Style | Fire | Scope / ADS | Jump | Crouch | Movement |
|---|---|---|---|---|---|
| 2-Finger Thumb | Bottom-right | Above fire | Above-right of fire | Bottom-left | Bottom-left (joystick) |
| 3-Finger Claw | Upper-left (left index) | Right-center | Right-center | Bottom-left | Bottom-left (joystick) |
| 4-Finger Claw | Upper-left (left index) | Upper-right (right index) | Upper-right near scope | Bottom-left | Bottom-left (joystick) |
Build from these positions, then adjust based on your device size and where your fingers naturally land. Everything below explains the reasoning behind each choice.
Why Your HUD Layout Directly Affects Gunfights
Free Fire’s gunfights are short and punishing. The TTK (time-to-kill) doesn’t give you room to fumble. If your fire button is in a position where your thumb drifts before pressing it, or if your scope button forces you to lift your aim to reach it — you’re already behind before the fight starts.
Three things your HUD controls in every gunfight:
- Reaction speed — how quickly you can fire, scope, and crouch without repositioning your hands
- Crosshair stability — buttons that require awkward stretches pull your thumb away from the movement zone and destabilise your aim
- Multi-action flow — in advanced play (claw), doing two things simultaneously depends entirely on whether your layout allows it physically
Default HUD is built to be inoffensive, not optimal. It places things where new players can find them, not where experienced players can execute fast.
Understanding HUD Zones on a Mobile Screen
Before placing buttons, it helps to think of your screen in zones based on where your thumbs (or fingers) naturally rest. Most players grip their phone with both hands, with thumbs reaching inward from the sides.
| Zone | Location | Best For |
|---|---|---|
| Zone A | Bottom-left quadrant | Movement joystick, crouch, prone |
| Zone B | Bottom-right quadrant | Fire button, jump, reload |
| Zone C | Right-center area | Scope / ADS button, melee |
| Zone D | Top half | Map, inventory, ping — low-priority actions |
| Zone E | Mid-screen (thumb range) | Secondary fire, grenade for claw players |
Anything that needs to happen during a gunfight belongs in Zones A, B, or C. Everything else — inventory, map, scoreboard — gets pushed toward the top where it’s safe to tap between fights but never mid-combat.
Default HUD vs. Optimised HUD
Here’s a quick comparison of what the default layout gets wrong and what an optimised setup fixes:
| Button | Default Position | Issue | Optimised Position |
|---|---|---|---|
| Fire | Far right-center | Too far for small-handed players | Lower-right, closer to thumb rest |
| Crouch | Bottom-right corner | Conflict with fire button reach | Lower-left, near movement zone |
| Scope (ADS) | Above fire button | Forces thumb lift mid-fight | Right-center, reachable without repositioning |
| Grenade | Top-right area | Unreachable mid-fight | Mid-right for claw, top-right for thumb |
| Jump | Right-middle | Conflicts with fire on small screens | Slightly above fire, separated clearly |
| Reload | Center-right | Fine for thumb, awkward for claw | Moved inward for claw grip |
| Peek Left/Right | Far edges | Good default, rarely needs changing | Keep default position |
| Prone | Bottom-left | Often confused with crouch | Give it dedicated space in Zone A |
The biggest issue with default: the fire button, scope button, and jump button are all competing for the same right-thumb zone. In a fast close-range fight where you need to jump, scope, and fire in quick succession, they’re fighting each other for the same thumb.
Best HUD Layout for Thumb Players (2-Finger)
Thumb players are the majority in Free Fire. Both thumbs handle all inputs — movement on the left, shooting and camera on the right. The goal for thumb layouts is reducing stretch and eliminating accidental presses.
Key principles:
- Fire button should sit where your right thumb rests naturally — not where you have to reach. For most players, this is the lower-right quadrant, roughly 65–70% from the left edge of the screen.
- Crouch belongs on the left side, reachable with the left thumb without leaving the movement zone completely.
- Scope button goes directly above the fire button with enough vertical gap that you don’t mispress.
- Jump should be clearly separated from fire — put it slightly left of fire or above it with a visible gap. Accidental jumps during gunfights are a common thumb-player problem.
Suggested button sizes for thumb play:
| Button | Recommended Size (% of max) | Notes |
|---|---|---|
| Movement Joystick | 90 – 100% | Bigger range = more precise directional input |
| Fire | 65 – 75% | Largest combat button — never go smaller |
| Jump | 50 – 60% | Needs clear separation from fire |
| Crouch | 50 – 60% | Left side, away from prone |
| Scope / ADS | 50 – 60% | Above fire with visible gap |
| Reload | 40 – 50% | Pressed between fights, not during |
| Grenade | 35 – 45% | Small is fine — rarely used in-fight |
| Prone | 35 – 40% | Smallest of all; keep it clearly separate from crouch |
Make the joystick and fire button your largest elements — you’re using them constantly. Everything else can be smaller since you’re not pressing them as frequently or under the same time pressure.
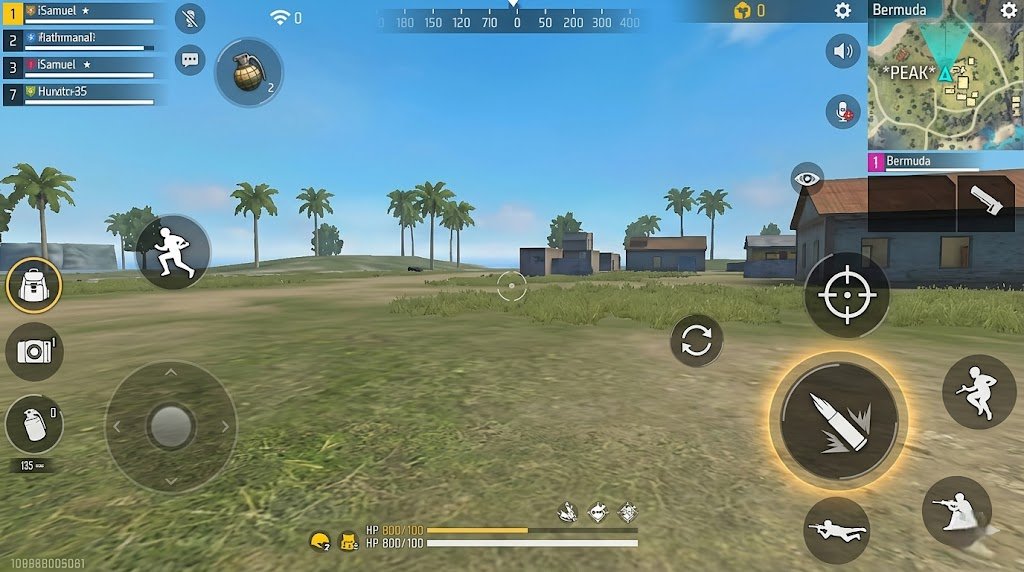 2-finger thumb layout — fire bottom-right, crouch bottom-left, scope above fire with clear separation
Use the screenshot above as a starting point. Adjust button positions based on your screen size and where your thumb naturally lands — don’t force it to match the image exactly if your grip sits differently.
Best HUD Layout for 3-Finger and 4-Finger Claw
Claw grip unlocks a different tier of mechanical input. With three or four fingers active, you can move, aim, fire, and jump simultaneously — which is a genuine advantage in close-range fights where jumping and crouching while firing makes your movement less predictable and harder for opponents to track.
The trade-off: claw layouts require more deliberate setup because you’re mapping non-thumb fingers to specific buttons that need to be in reachable positions for your index fingers.
3-Finger Claw Setup:
- Left thumb: movement joystick
- Right thumb: camera movement and minor buttons
- Left index finger: fire button — placed on the left side, upper area within left index reach
Because the left index finger takes over firing, your right thumb is now free to handle scope, jump, and camera simultaneously. This is the biggest mechanical unlock in Free Fire claw play.
4-Finger Claw Setup adds:
- Right index finger: scope / jump button — positioned in the upper-right area within right index reach
Both index fingers now handle combat buttons, leaving both thumbs purely for movement and camera — which dramatically improves aim stability during movement.
Claw button placement guide:
| Button | Thumb Layout Position | 3-Finger Claw Position | 4-Finger Claw Position |
|---|---|---|---|
| Fire | Lower-right | Upper-left (left index) | Upper-left (left index) |
| Scope / ADS | Right-center | Right-center (right thumb) | Upper-right (right index) |
| Jump | Above fire | Right area (right thumb) | Upper-right near scope (right index) |
| Crouch | Lower-left | Lower-left (left thumb) | Lower-left (left thumb) |
| Movement | Lower-left (joystick) | Lower-left (left thumb) | Lower-left (left thumb) |
The hardest part of transitioning to claw isn’t the layout — it’s building muscle memory. Expect your performance to drop for the first two to three weeks. That’s normal. The mechanical ceiling claw unlocks is worth the adjustment period.
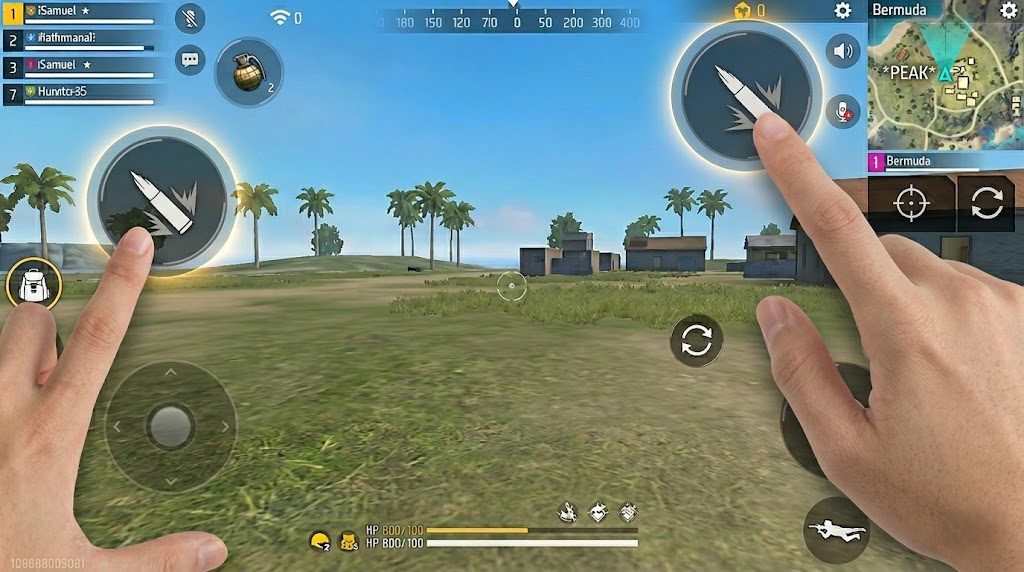
 3-finger claw layout — fire moved to upper-left for left index finger, right thumb freed for camera and scope
Use the screenshot as your reference. Recreate the positions manually in your HUD editor, then test in training mode before taking it into a real match.
 4-finger claw layout — both index fingers on combat buttons, thumbs handling movement and camera only
Same approach — build it manually from the screenshot. On larger screens, push the index-finger buttons slightly further toward the edges until they sit within natural reach without repositioning your grip.
HUD Settings Worth Enabling
Beyond button placement, there are a few HUD settings in Free Fire’s options that are worth turning on or adjusting:
Auto Prone in Water — turn this on. It removes the manual button press when entering water bodies, which is one less thing to think about.
Shoot Mode: Single Tap vs Hold — most players default to hold-to-shoot. Single tap can be more responsive for burst weapons and shotguns but takes adjustment. Test both before committing.
Fixed Joystick vs Floating Joystick — fixed places the joystick in a set position; floating spawns it wherever your left thumb touches. Most experienced players use fixed because it removes the slight positioning variance that floating introduces when you drop your thumb in a slightly different spot each time.
Peek and Fire — if you’re playing a passive, cover-heavy style, enabling peek-and-fire in settings adds side-lean to your layout. Useful in ranked end-game. Less useful in aggressive rush play.
HUD Layout Tips by Device Screen Size
Screen size changes everything. A layout that works perfectly on a 6.7-inch phone can feel completely broken on a 5.7-inch screen because the reach zones shift.
| Device Screen Size | Key Adjustment |
|---|---|
| Under 6 inches | Bring all buttons closer to center. Joystick slightly inward. Fire button noticeably inward. Reduce all button sizes by 1 step. |
| 6.0 – 6.5 inches | Use standard recommended positions. Most guides (including this one) are calibrated for this range. |
| 6.5 – 6.9 inches | Push fire button slightly further right and down. You have more room — use it. Joystick can go slightly lower. |
| 7 inches and above (tablets) | Everything shifts significantly outward. Claw play is easier on tablets due to wider reach. Thumb play on tablets often benefits from a third button zone in the center. |
If you recently upgraded phones and your layout “stopped working,” this is almost certainly why. Don’t rebuild from scratch — just nudge buttons outward or inward by small increments until the reach feels right again.
How to Save and Test Your HUD Layout
Free Fire lets you save multiple HUD presets, which is something too many players ignore. Here’s how to approach testing:
- Build your layout in custom room or training mode first — not a real match. You need zero pressure to feel where things are.
- Pay attention to which buttons you miss most often — your gameplay habits reveal what needs adjusting better than any preset recommendation. If you keep accidentally jumping instead of firing, or crouch when you mean to prone, those patterns tell you exactly what to move. Fix the specific problem, not the whole layout.
- Play 5 training ground sessions focusing exclusively on whether buttons are where you reach for them instinctively. If you’re looking at your screen to find a button, it’s in the wrong place.
- Save two versions — your main layout and a backup version that’s slightly more conservative (bigger buttons, slightly more spaced). The backup is useful if your hands are tired or you’re playing casually.
- Run 10 real matches before tweaking anything. Your muscle memory is adjusting. Panic-changing buttons after two bad matches just resets the adaptation process.
- Evaluate specifically — don’t just ask “is this better?” Ask: did I accidentally jump when I meant to fire? Did I ever struggle to reach my scope button? Did crouch and prone ever get confused? Fix specific issues, not vague feelings.
Common HUD Mistakes That Hurt Performance
Most players don’t know their HUD is hurting them — they just blame aim or sensitivity. These are the specific mistakes that quietly cost gunfights.
Overlapping buttons. When two buttons share screen space or sit too close, accidental presses become routine. The most common overlap is crouch and prone stacked near each other on the left side — one missed tap and you’re lying flat mid-fight with no cover. Give every combat button a clear gap from its neighbours.
Fire button too small. Players shrink the fire button to clear screen space, then wonder why their tap doesn’t register under pressure. The fire button is the single most pressed element in your entire HUD — it should be the largest button on screen, period.
Constantly changing layouts. Switching your HUD every few days is one of the slowest ways to improve. Every change resets your muscle memory, which means every match becomes a calibration session rather than actual gameplay. Pick a layout, commit to it for at least two to three weeks of real matches, and only change specific things that are genuinely causing identifiable problems.
Copying pro-player HUDs blindly. Pro layouts are built around specific devices, hand sizes, years of muscle memory, and playstyles you may not share. A 4-finger claw layout from a streamer who plays 8 hours a day on a gaming phone will feel completely foreign if you’re a casual thumb player on a budget Android. Use pro setups for inspiration and ideas, not as-is copies.
Not adjusting after switching phones. Changing from a 6.1-inch to a 6.7-inch phone and keeping the same layout is a setup for frustration. Your reach zones shift with screen size, so buttons that once sat exactly where your thumb landed now require a stretch. Any time you change devices, rebuild your layout from scratch using the new phone’s dimensions.
Putting crouch and prone too close together. This deserves its own mention because it’s so widespread. Both buttons tend to cluster near the bottom-left because that’s where the movement zone is, but if they’re within accidental-press range of each other, one mistimed tap sends you prone in the open. Keep at least a full button-width of space between them, and consider making prone noticeably smaller than crouch since it’s used far less often in live combat.
Ignoring the joystick size. Too many players leave the joystick at default or even shrink it. A small joystick forces your thumb into precise movements for basic directional input — tiring and imprecise. Max or near-max joystick size gives you a wider physical range for directional inputs, which makes movement feel more natural and less like you’re threading a needle with your thumb.
Frequently Asked Questions
What is the best HUD layout for Free Fire beginners? Start with a slightly modified version of the default layout — keep the general button positions but move the fire button inward toward your natural thumb position and give crouch its own clear space on the left side. Don’t go for advanced claw layouts until you’re comfortable with the base game mechanics.
Should I use a 3-finger or 4-finger claw layout in Free Fire? 3-finger claw is the most common upgrade from thumb play and gives you a significant mechanical boost without the steep learning curve of 4-finger. Start with 3-finger, master it, then decide if 4-finger is worth the additional adjustment period.
How do I make my HUD layout smaller or bigger? In the HUD customisation menu, select any button and use the resize handle at the corner to scale it. Smaller buttons free up screen space; larger buttons are easier to hit reliably under pressure. Prioritise fire and joystick being large; secondary buttons can be smaller.
Does HUD layout affect sensitivity? Not directly, but indirectly yes. If your fire button is too far from your natural thumb position, your thumb has to travel further to press it — and that movement shifts your aim. Fixing layout often makes sensitivity feel better without actually changing the sensitivity values.
Can I import someone else’s HUD layout in Free Fire? Unlike some mobile shooters that use text string codes, Free Fire handles custom layouts via direct links and QR codes. Go to Settings → Controls → Custom HUD, where you can generate a share link or scan a QR code from another player. Always treat an imported layout as a starting point — a setup built on a 6.8-inch gaming phone will feel cramped or mis-positioned on a 6.1-inch device until you scale the buttons to your actual reach.
What buttons should I always have visible on my HUD? At minimum: movement joystick, fire, jump, crouch, scope/ADS, reload, and grenade. Prone is optional depending on playstyle. Map and inventory can be small and out of the way — you’re tapping those between fights, not during them.
How often should I change my HUD layout? Only when something specific is clearly not working — not because you had a bad game. A layout that’s been dialled in through real match testing is worth protecting. Random changes just because someone else’s layout looks cool is how you end up permanently stuck in adjustment mode.
Does HUD layout matter for ranked Free Fire? Absolutely. At higher ranks, fights get faster and opponents are better at punishing mechanical mistakes. A layout where fire, scope, and movement all feel natural and effortless removes friction from every gunfight — and in ranked, that margin matters more than anywhere else.
Final Verdict
There’s no universal perfect HUD layout in Free Fire — but there is a wrong one, and it’s probably whatever you’ve been using since you installed the game without touching it.
Here’s the short version of everything above:
- Best for beginners — 2-finger thumb. Lowest learning curve. Focus on getting fire, crouch, and scope into comfortable positions and leave everything else for later.
- Best balance of performance and accessibility — 3-finger claw. One mechanical upgrade from thumb play that unlocks simultaneous movement and firing. Worth the adjustment period.
- Highest skill ceiling — 4-finger claw. Both index fingers on combat buttons, both thumbs free for movement and camera. The hardest to learn and the most rewarding once it clicks.
Whichever style fits your grip, the investment in getting your layout right is a one-time cost that pays off in every match after. Start with the positions in this guide, give it real match time before judging anything, and adjust based on what you actually feel — not what looks good in a screenshot.
Comments 0
Leave a comment